1. Howtos for Non-Programmers
1.1. Enrol in a course
If you do not have an account on the website: Create one.
If you already have an account, but forgot your password, click on “Forgot Password?” in the login form and follow the instructions.
Log in.
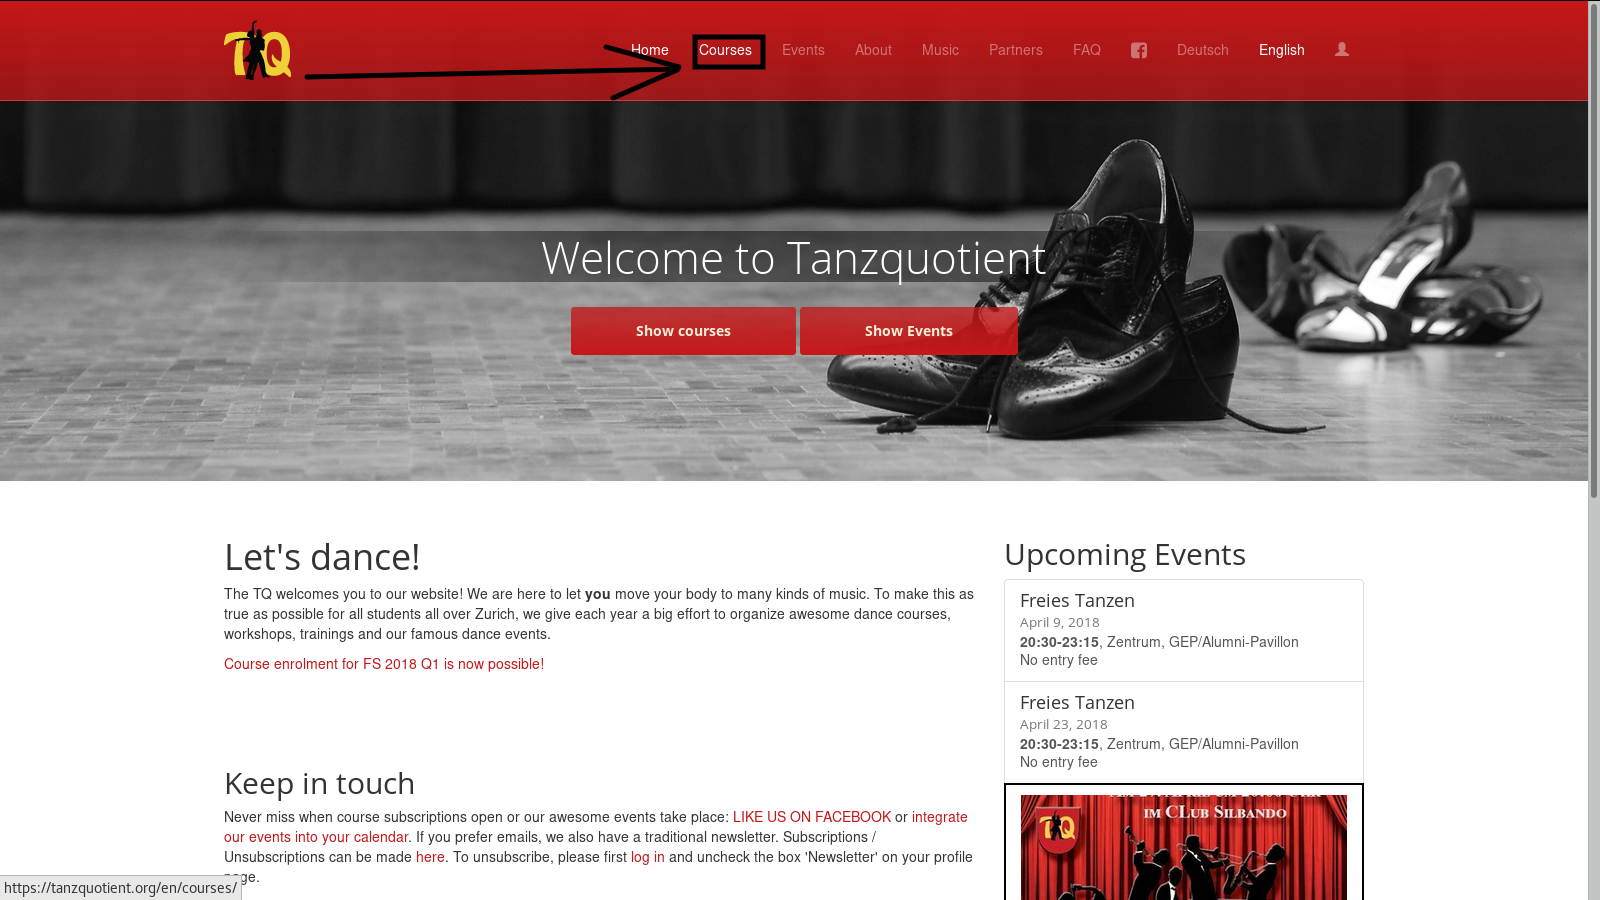
Go to courses.
Scroll down and click on the “Anmelden” link of the course you want to enrol in. In the example picture, this is the “Collaboration Cubaliente”.
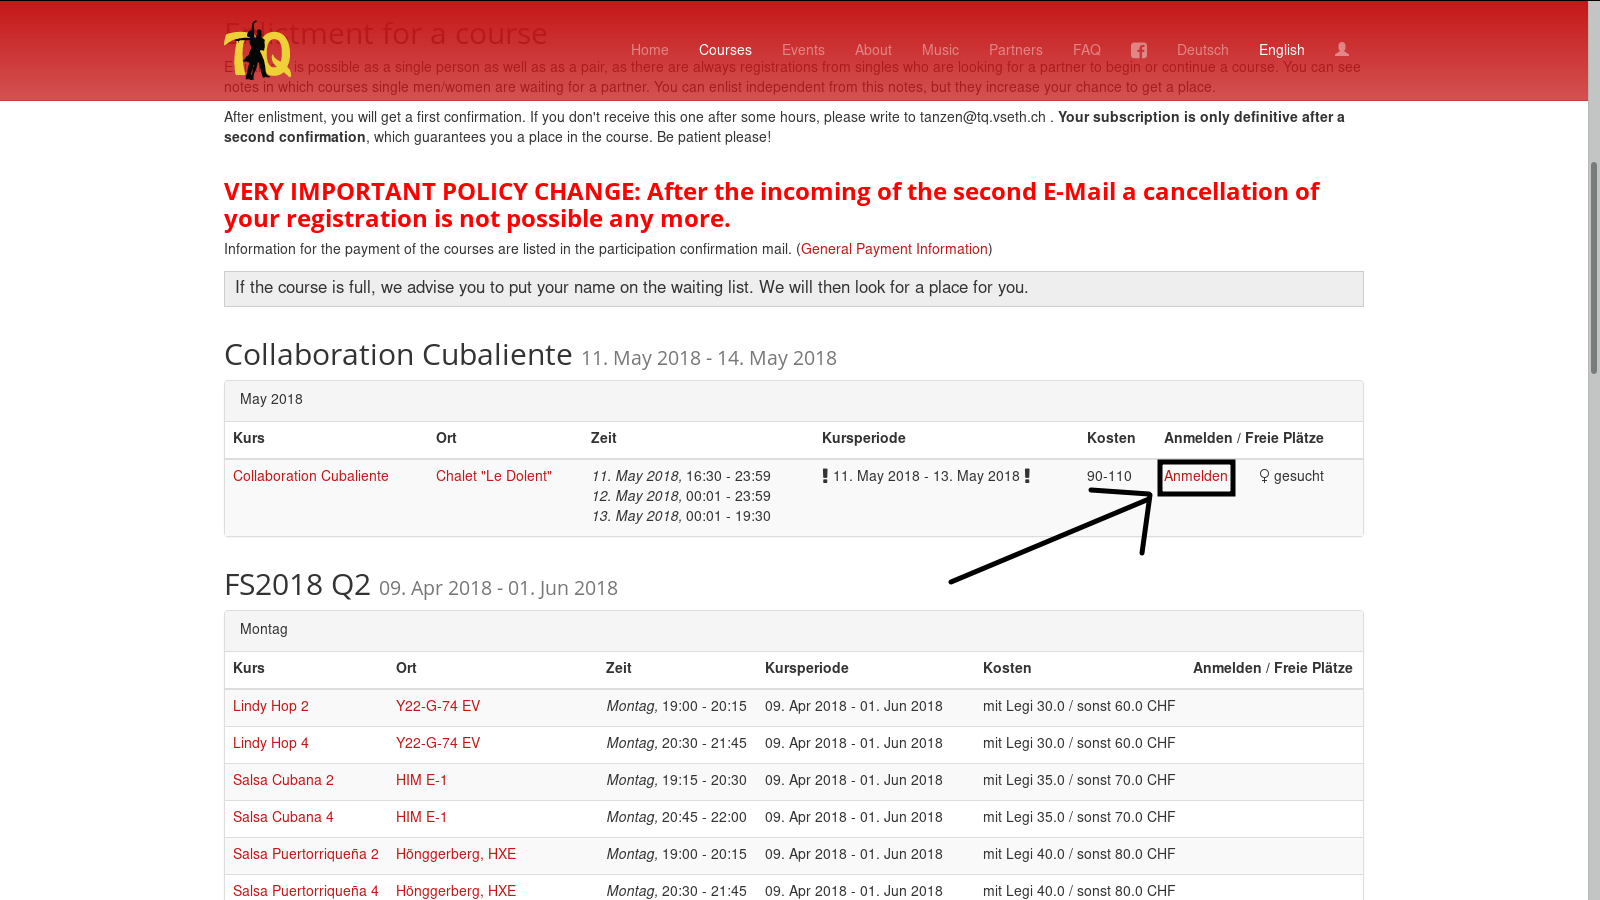
You are now at the enrolment page. It should look something like this:

If you are enrolling to a couple course, you can enrol together with your partner. For this, enter his/her email address in the field “Partner email”. Note that this must be the email address that your partner uses in his TQ account. You can also enrol alone, and we will try to find a partner for you.
Not required: Give us some hints about your experience and/or other comments.
Check the checkbox.
Click on the “Anmelden” button.
Congratulations, you have successfully enrolled! Check your email account for a confirmation email, click the link in it and wait for a second email from us where we confirm your enrolment definitely.
1.2. I have problems enrolling
When I try to enrol my partner, the system says that nobody with this email is registered. But when I try to create an account for this email address, it says that this address is already used.
Solution (student):
Contact the website admin by email informatik [at] tq.vseth.ch, or use the support chat https://t.me/joinchat/AlE6nw89dgmPvObM8kcKQA.
Solution (TQ responsible person):
This is a multiaccount issue caused by an old version of the website. It was possible to enrol without an account, but the system internally created an account, which led to the situation that there were multiple accounts associated with the same email address. Fixed on the 1st of April 2018.
- Search for the user profiles.
- Select the one where the last login lies further back. If no “last login” time is set, this means that the last login was very long ago.
- Inactivate this profile by removing the “Active” checkbox.
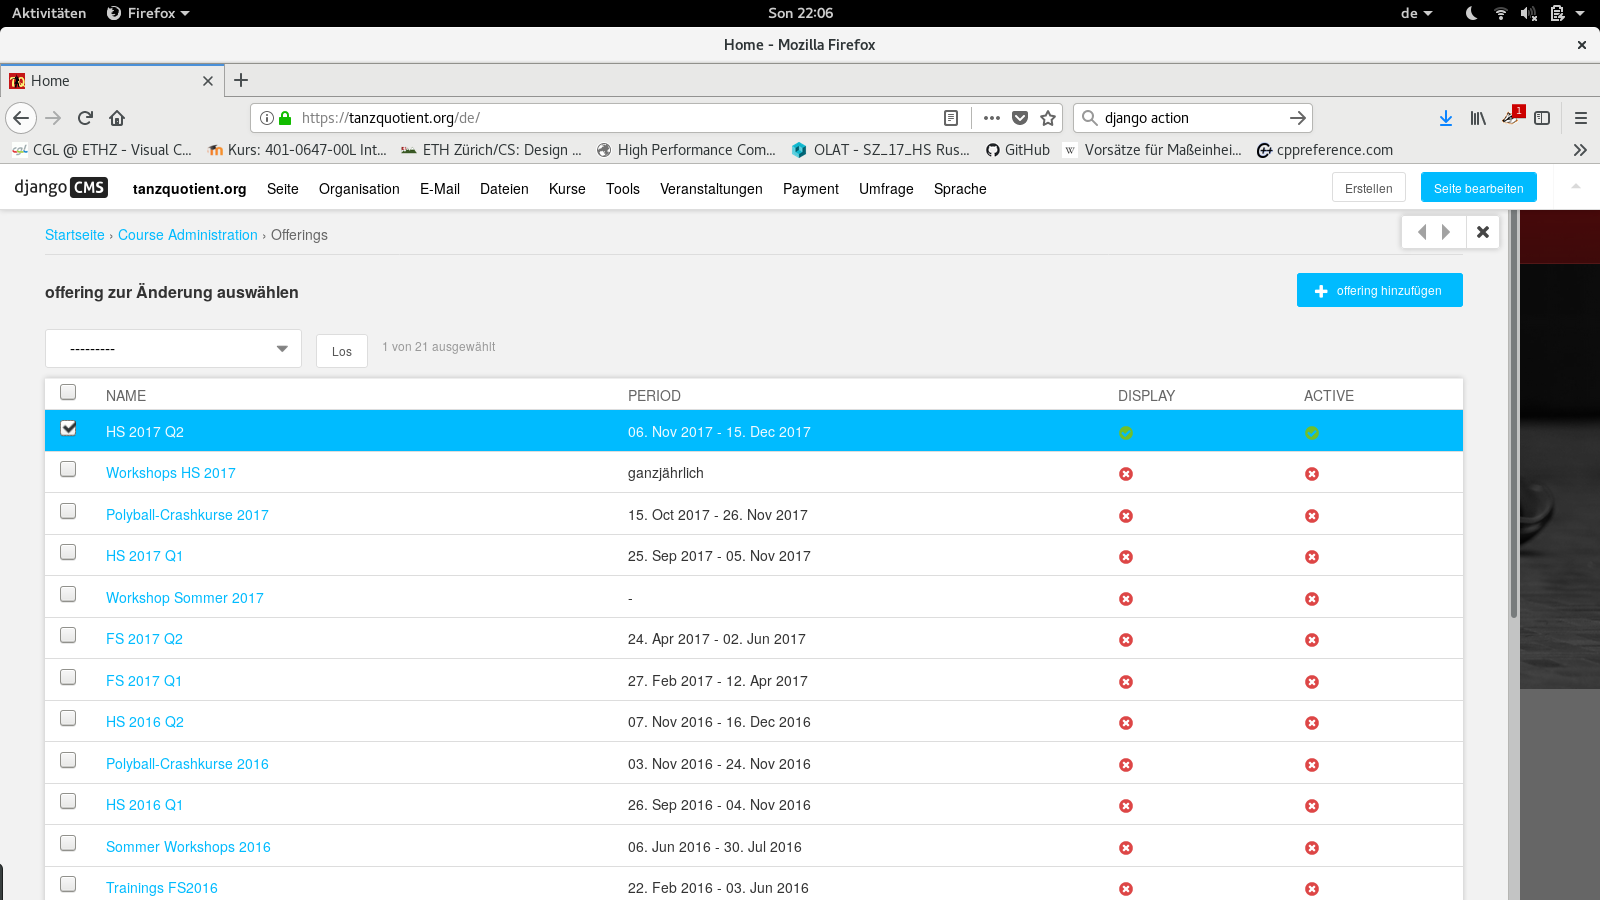
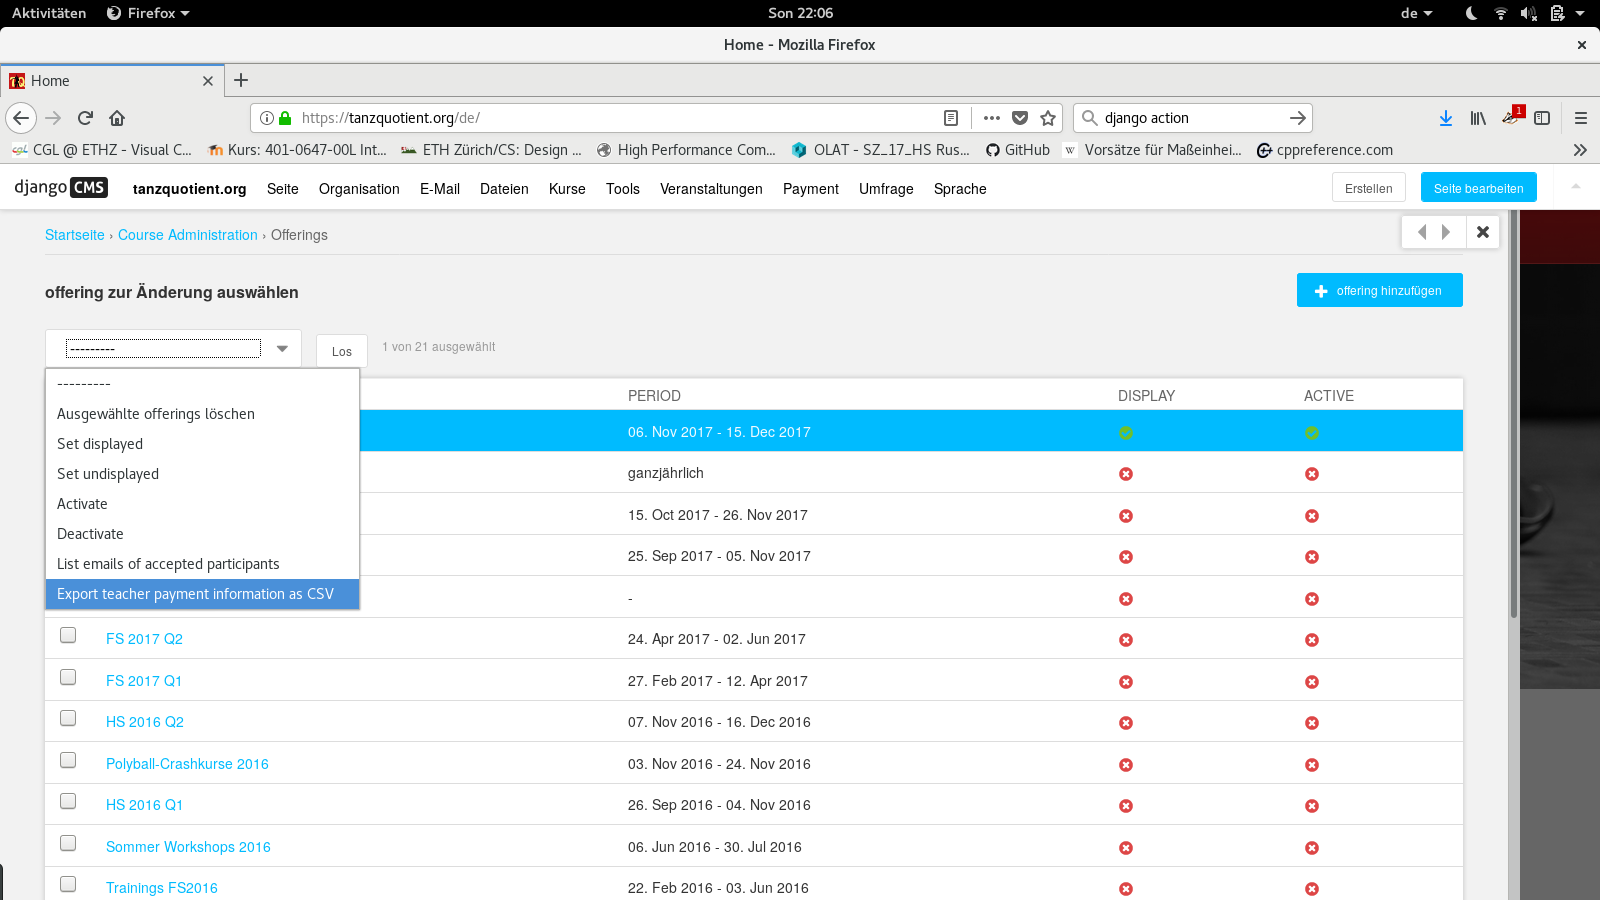
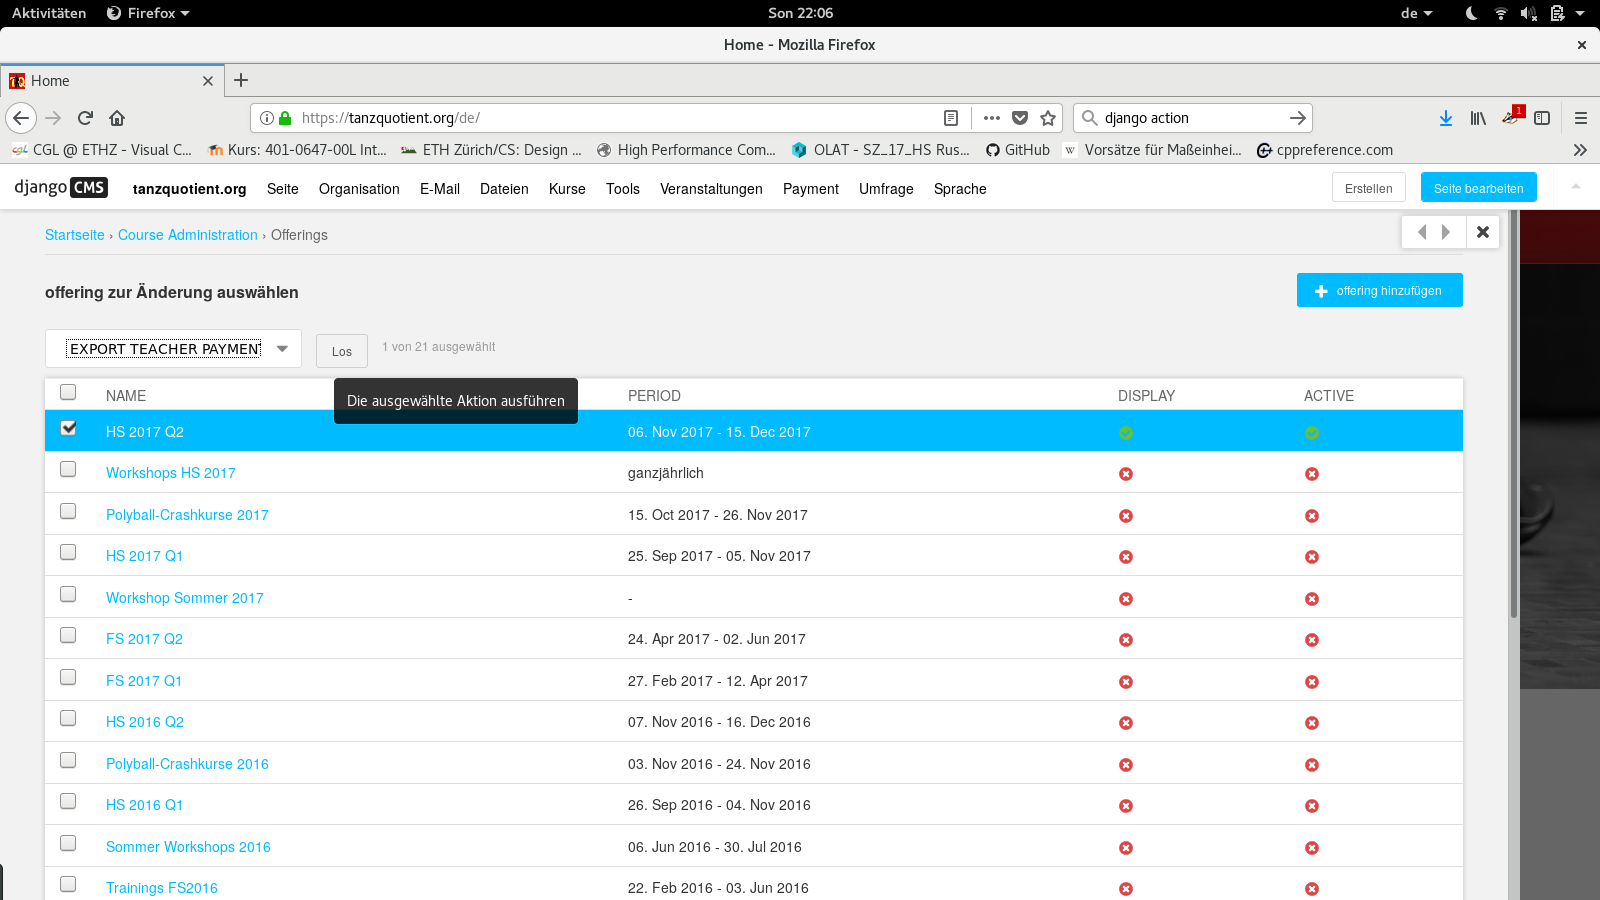
1.3. Export (payment) information of the teachers
The following steps refer to the buttons in the admin panel. If you cannot see them, you probably don’t have enough rights. Please contact the administrator in this case.
Go to Courses –> Course offerings.
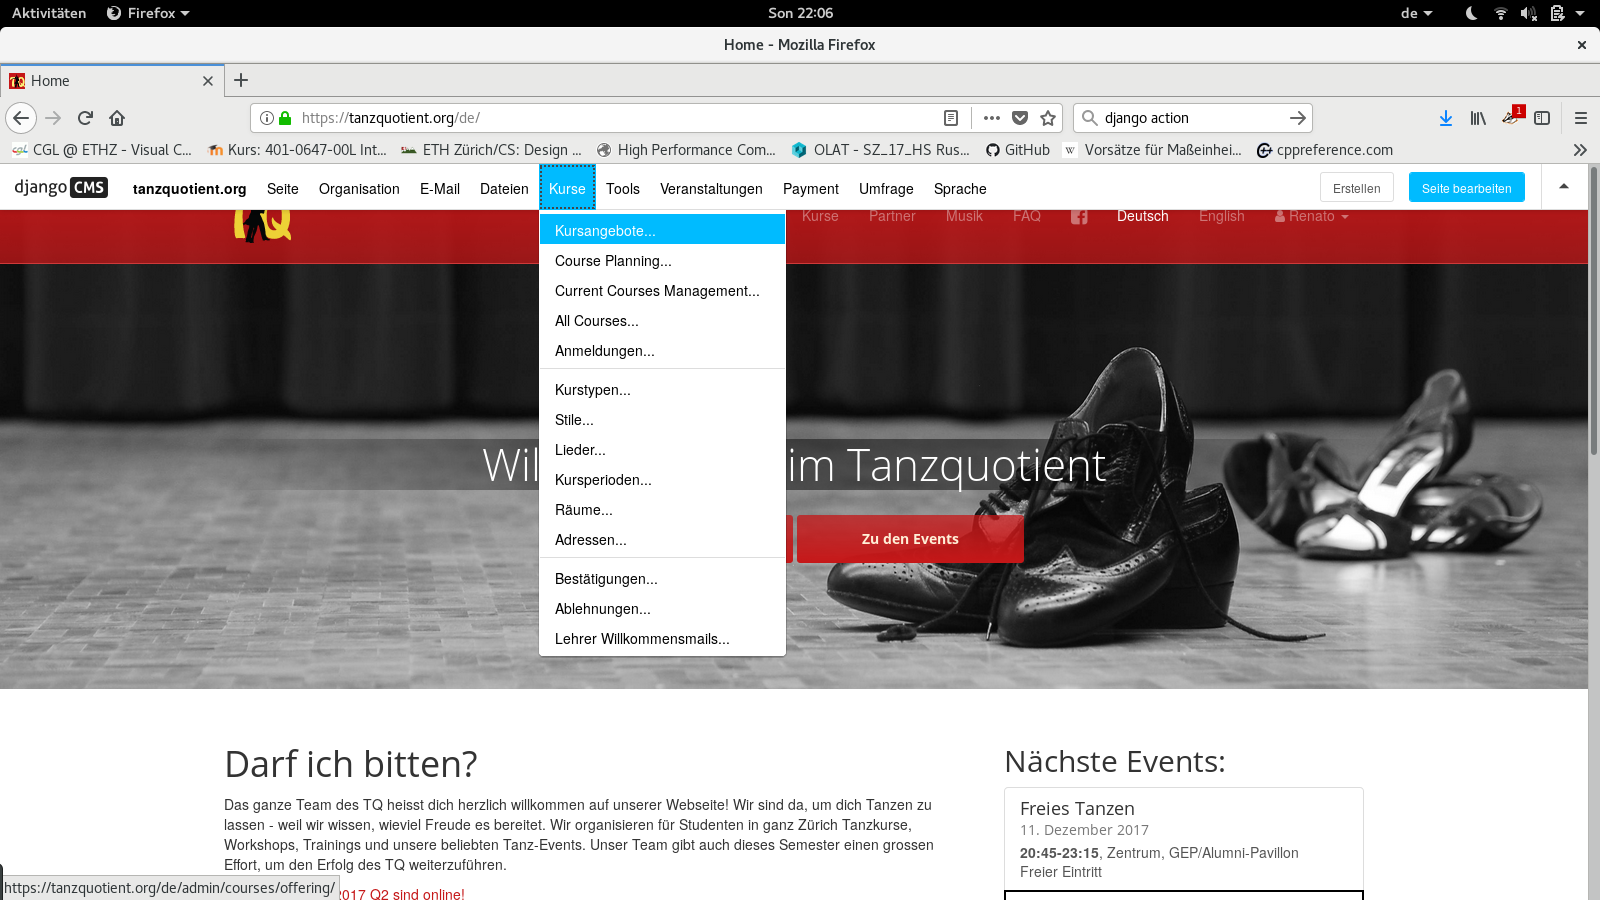
Select the course period during you’re interested in.
Select “Export teacher payment information as CSV” in the action selection widget.
Click “OK” and download the CSV (comma separated values) file to your computer. You can open it with your favourite spreadsheet processing program (e. g. Microsoft Excel or LibreOffice Calc).
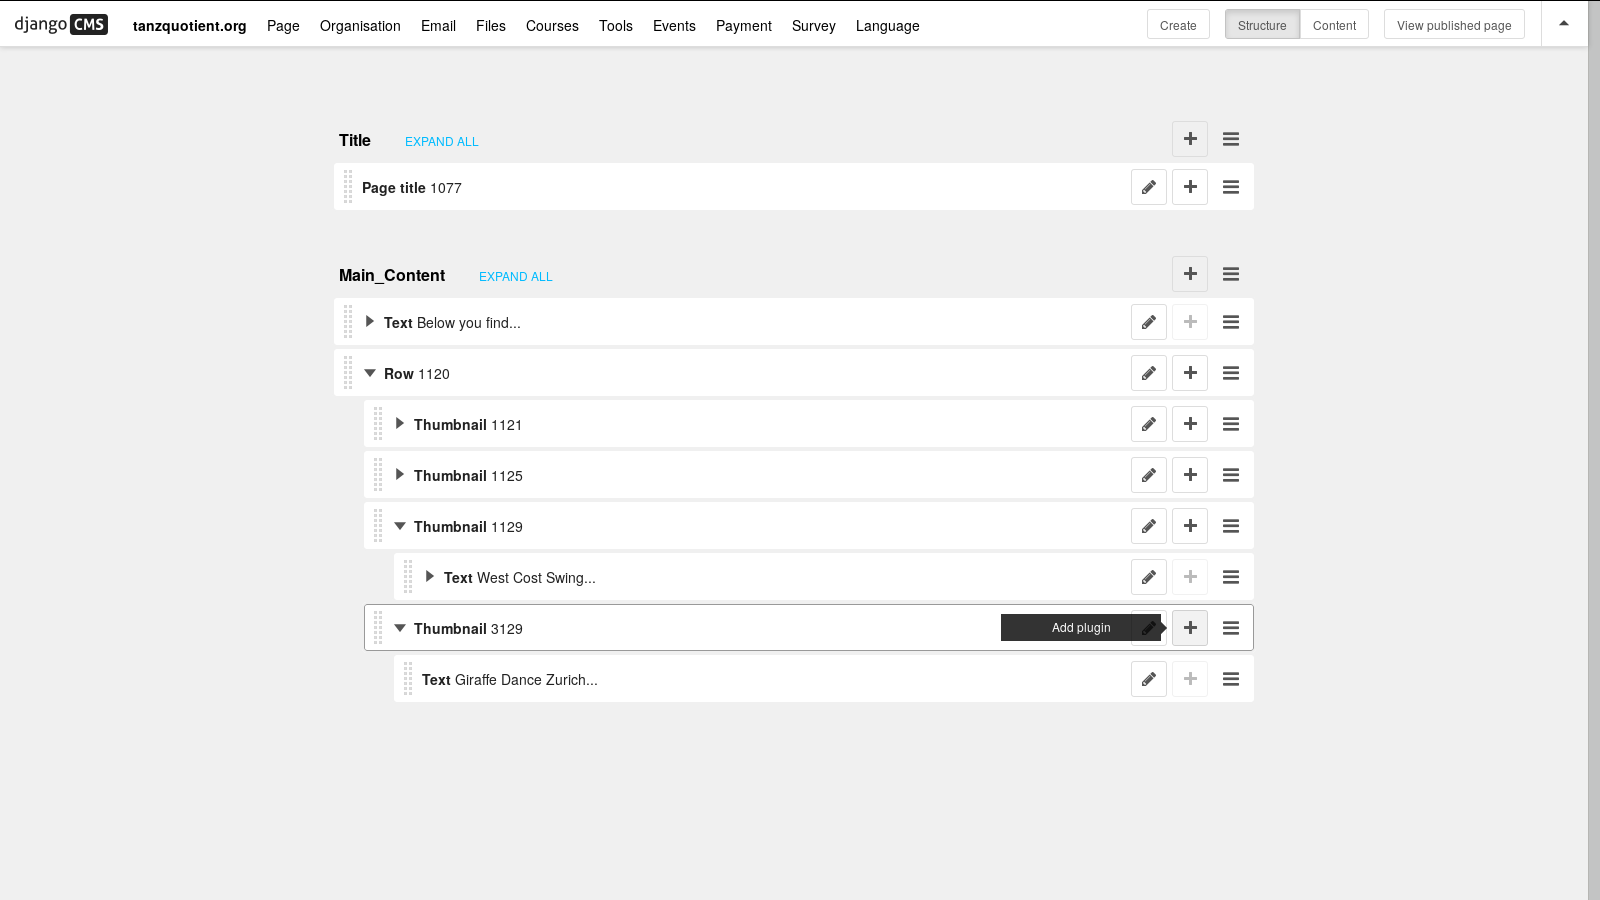
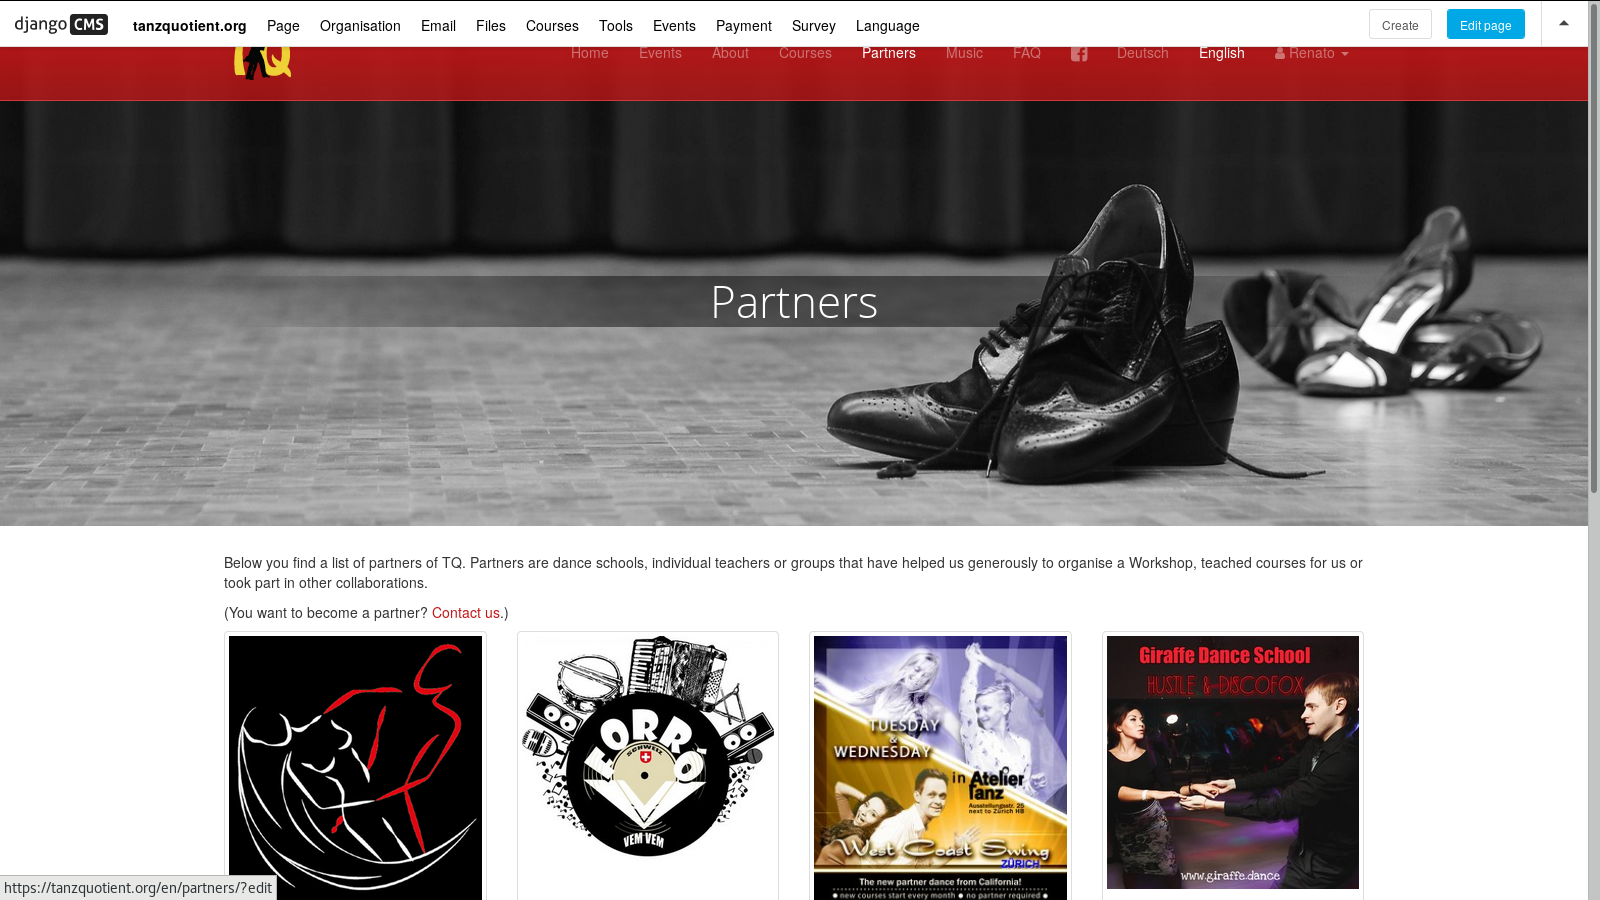
1.4. Add a new partner association
Log in to the website and go to our partner page. You might have to perform the steps below for all languages.
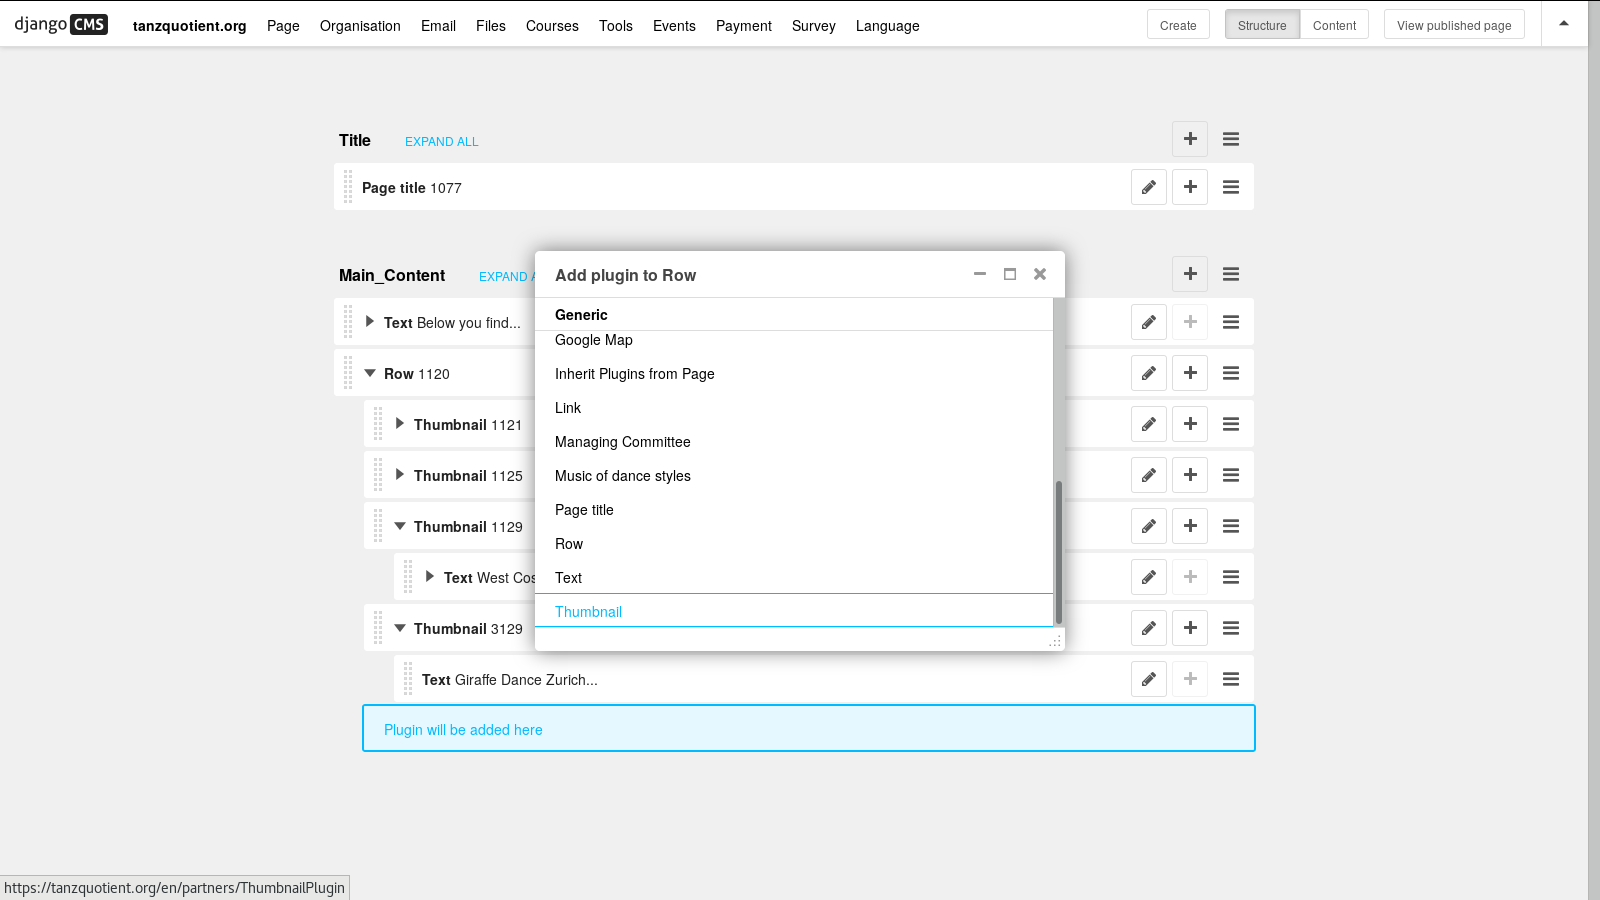
Display the admin toolbar (the white toolbar).
Click the “Edit page” button in the top right corner.
Click on “Structure” in the top right corner.
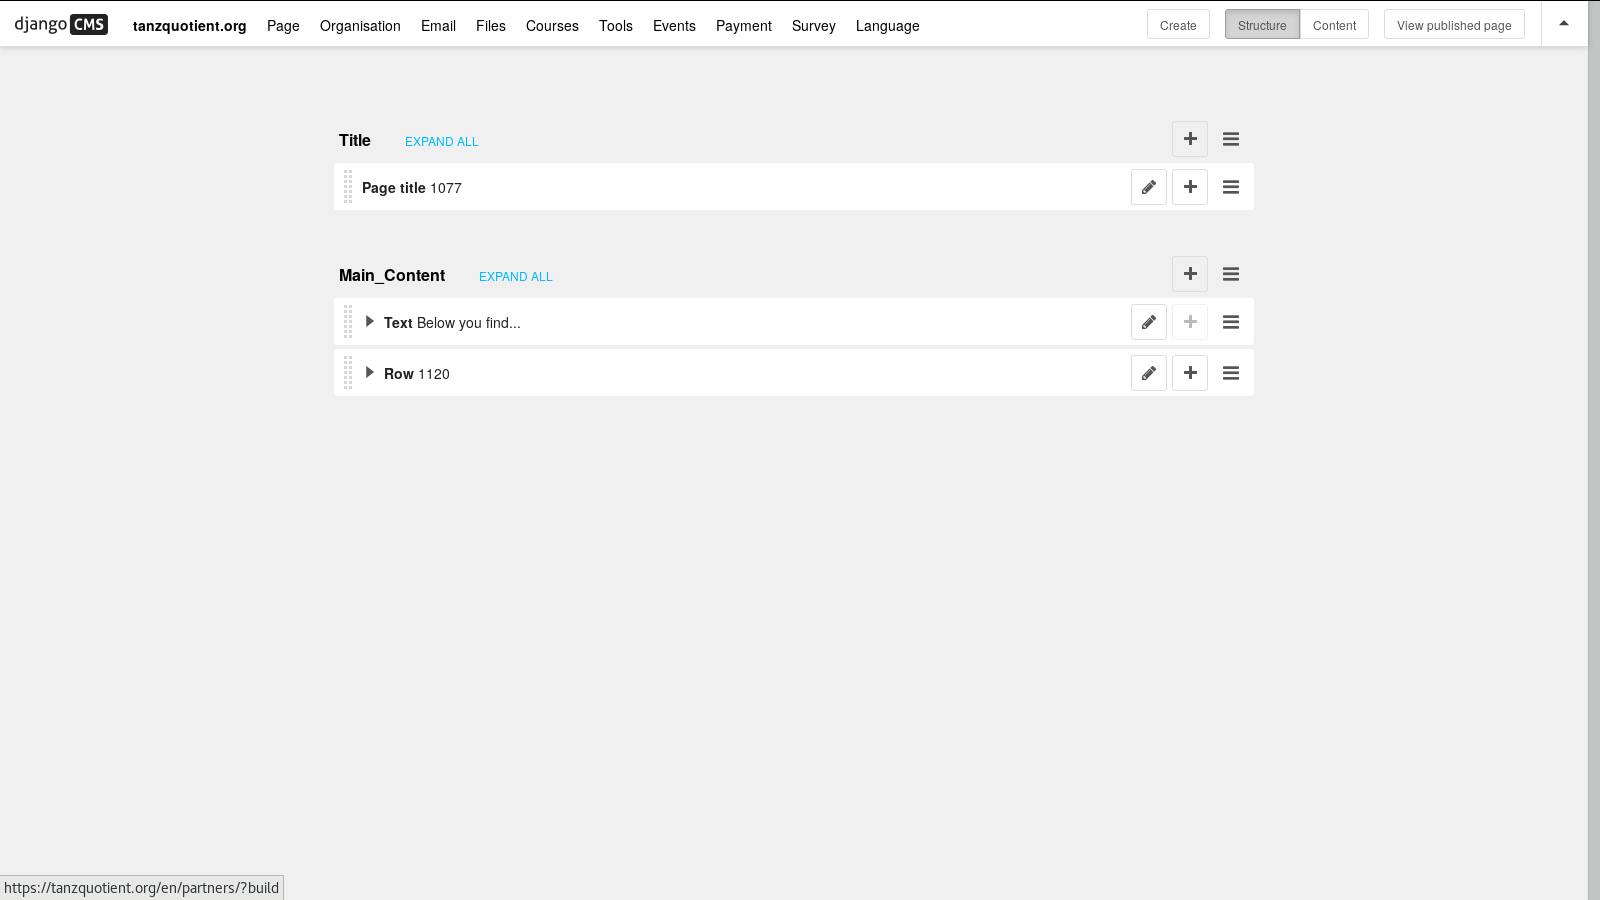
Expand the row by clicking on it.
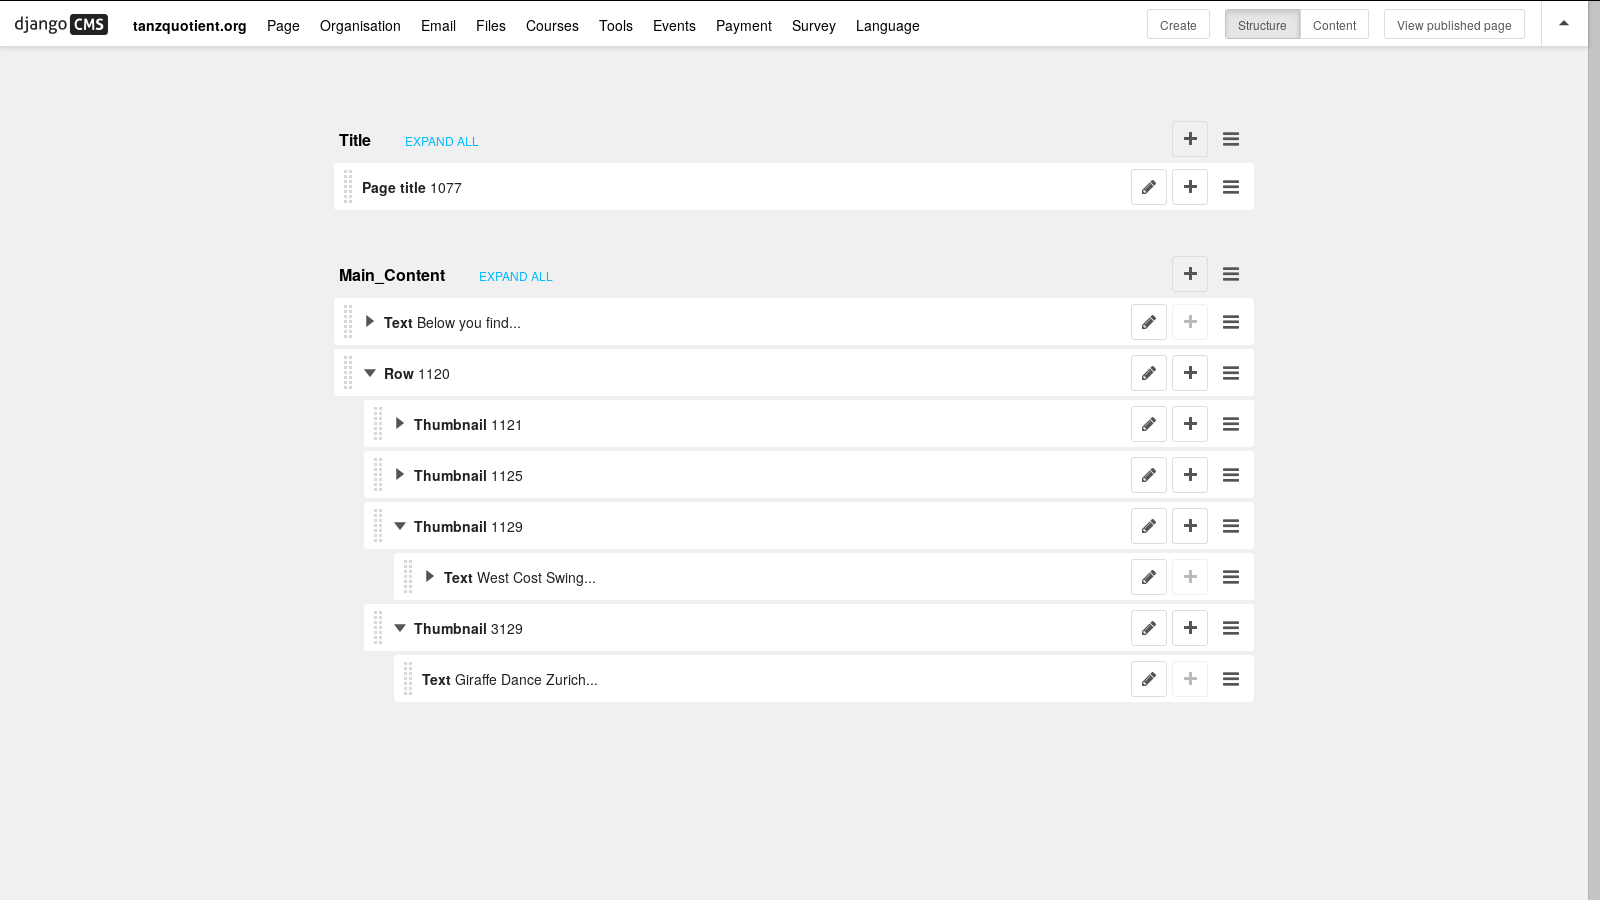
Click the “+” button in the row entry to add a new thumbnail (i. e. a clickable image).
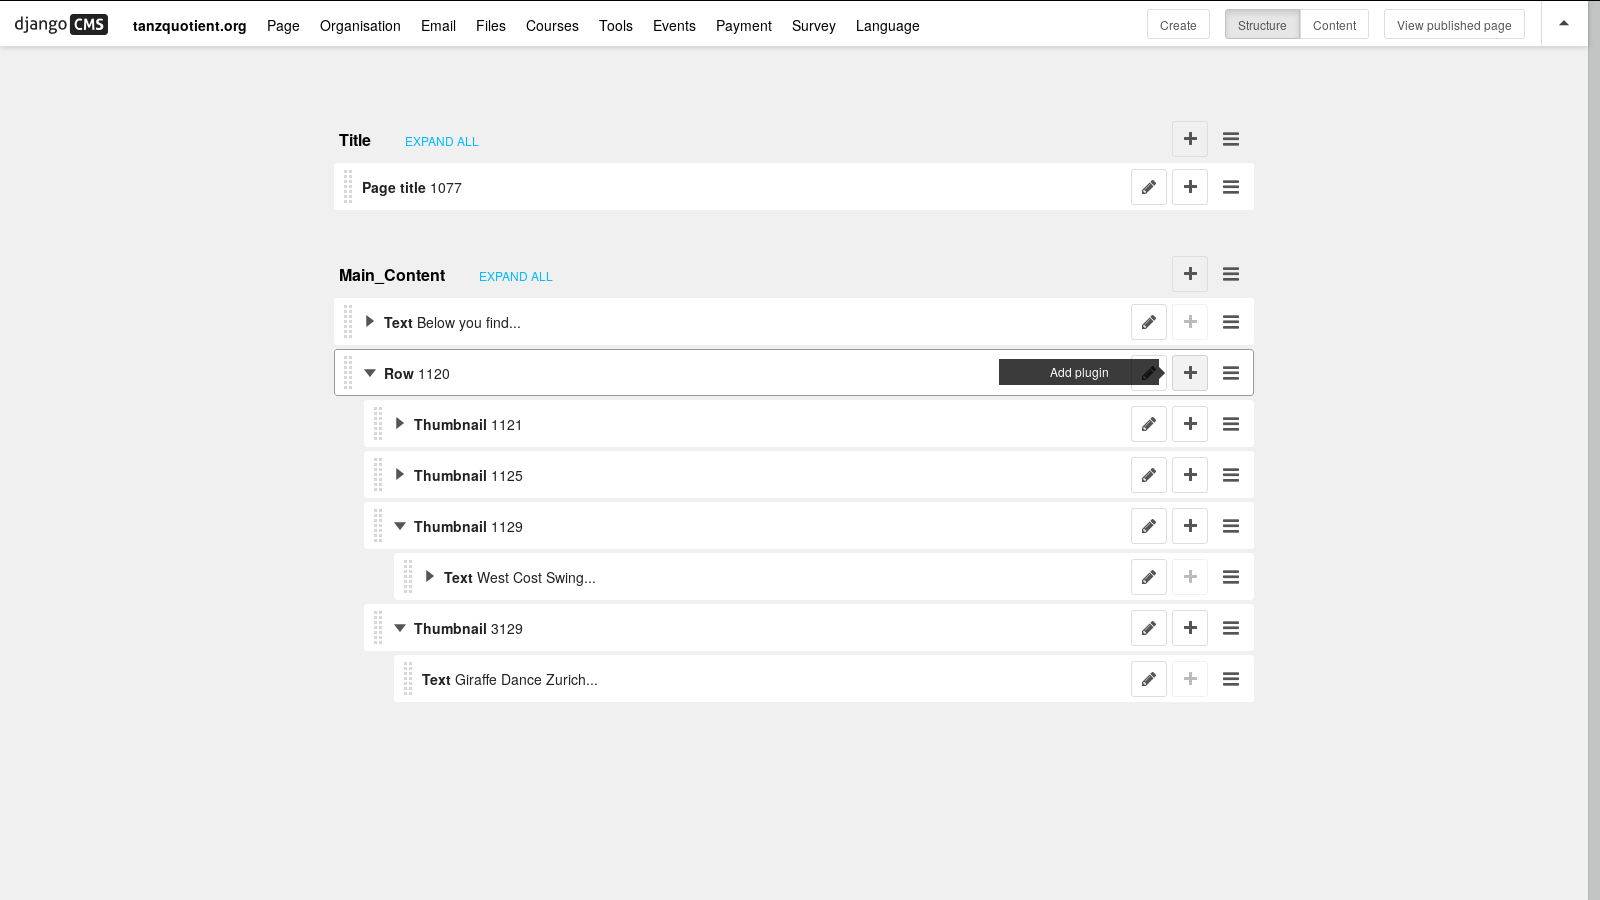
Select “Thumbnail” in the list.
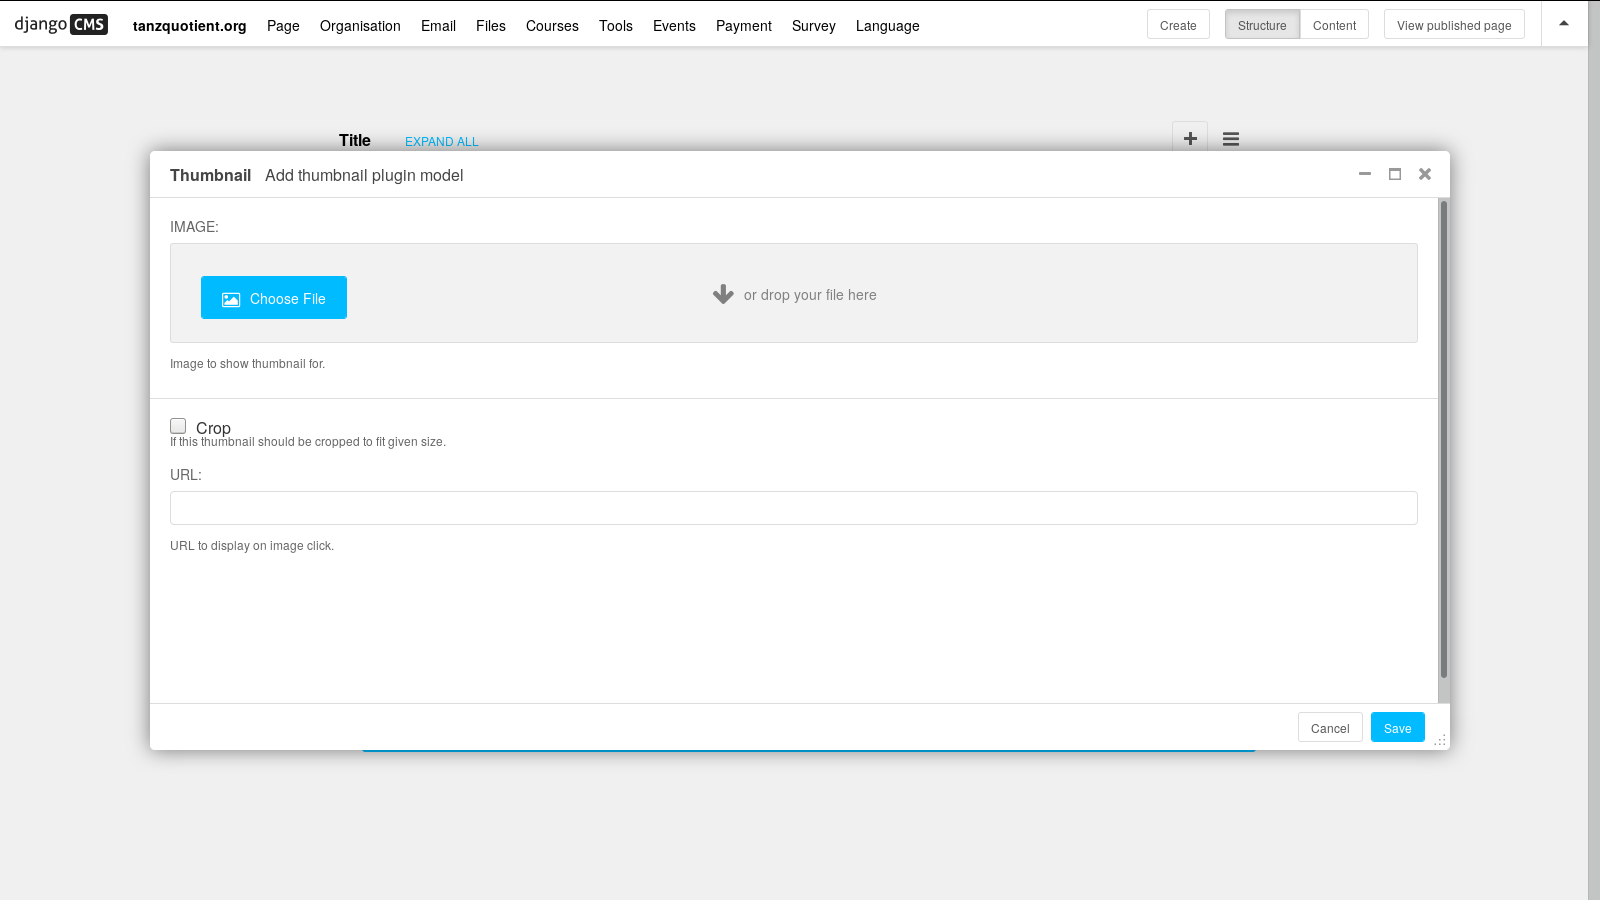
Now you can select the image to display and a URL. This is the URL that will be opened if the user clicks on the image. When you’re done, click on the “Save” button in the bottom right corner.
Finally, you can add the description text below the image. To achieve this, do the same steps as before, but add the test box as a subelement of the thumbnail you’ve just created (NOT of the row)!